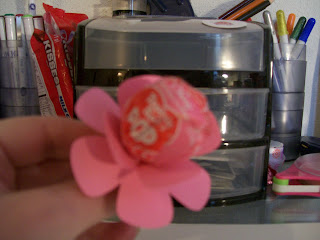
I hope you are having a fantastic week. I am so glad it is Friday...Just a quick post to show you some projects that I made for our church MDO kids and teachers. I made the Lollipop Flowers for the teachers. For the kiddo's, I wanted something simple because all of these kids are under 5. I wanted them to be cute, but I knew that whatever I made was going to be thrown away. Here is what I decided on. What do you think?
 I punched a pink scallop and then punched 2 holes in it. I used my CM heart punch and put it on top of the scallop. I wrote Love on the heart with a white gel pen. I stuck the Tootsie Roll Pop in the holes and this is the end result. I was going to tie some ribbon on, but I figured that the little fingers might have a hard time getting it undone. I know this is super simple, but I think they are cute.
TOOTSIE POP FLOWER TUTORIAL
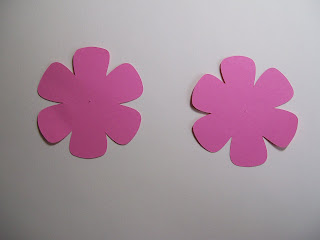
Cut two flowers of your choice. The petals all need to be the same size for this to work well.
I cut mine from PS at 2 1/2 in. using the shadow feature.
I cut mine from PS at 2 1/2 in. using the shadow feature.

Take one of your flowers and cut a petal off. This is so that you will be able to make a cone with it, as shown below.
Next you use either adhesive, or a hot glue gun ( I found that this works best) and fold one petal over the other to create this cone shape.


Turn the 4 petal flower over and snip off the bottom....appx. 1/8 to 1/2 an inch. This will allow you to slide your flower onto the lollipop.


Slide the flower up onto your lollipop. As you get to the top, you may need to turn it so that you can get it above the lollipop paper. Make sure it fits snug up to the top.
Now you take your other flower and fold it in half. Cut a small slit in the bottom. Then fold it in half the other way and cut another small slit. (This creates the hole.) Before I slide this flower on my lollipop, I ink my edges. This would be the time to run it through your Cuttlebug or like machine.

Slide the 2nd flower up and repeat what you did for the first flower. I take my hot glue gun and place a small amount of hot glue around where I cut the slits in the second flower. This helps the second flower stick to the first one and stay in place.

Next take a ribbon, or your embellishment of choice and attach it at the base. If you choose to add ribbon, you will want to tie it as close to your bottom flower as possible. This is another measure to secure it.


Here is the finished product!! I stickled the edges of this flower. I have also used glitter. As I was hot gluing these yesterday, it occured to me that you could drop some beads of hot glue on your petals and let it dry. This looks like dew on your flower. Just a thought. I'm sure all of you have realized this already, but just a thought.
Thanks so much for taking your time to look. As always your comments are welcome. Oh, one last pic for you. I covered a Hershey bar for a friend. Here is a pic of the finished product. Thanks, I hope all of you have a lovely Valentine's Day!
Robyn


These are super cute, I love the flowers under the lollipops. That would be cute for any occasion. Thanks so much for sharing!!
ReplyDeleteLove those ideas for the lollipops. The flower petals was my favorite because it is so unique & really does make it look like a flower especially if you add a lot of them.
ReplyDeleteVery nice job!
TFS...
Hugs,
Sonia