Friday, January 29, 2010

Easel Card


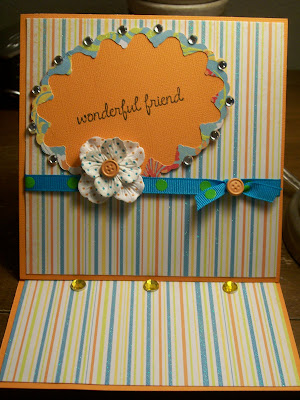
I saw the concept for this card at http://www.southernbellescrapper.blogspot.com/  She has a link for instructions.  Go check her out.  She has some wonderful things on her blog.  It really is simple to make and her instructions are a breeze to follow.  I used DCVW Citrus cardstock (my new favorite as of late,) Home Accents Cricut cartridge, bling, brads, flowers, ribbon and a stamp that I picked up at Hobby Lobby.


Here is a side view of what the finished card looks like.  The lighting isn't great, but you get the idea.  I hope you all have a Happy Friday!  As always, your comments and feedback are welcome.  I would like to thank those who have signed up to follow my blog.  Your support really means a lot to me.

Thanks,
Robyn

Wednesday, January 27, 2010

More Archivers Pics


This is a Travel kit by Making Memories.  It is a large kit whereas the LOVE kit was a small one.  My DD got this.  She is going to use these things to do a chipboard travel album.  I will post pics when she is done. 


This is a pic of the back of the package.  It contains quite a bit of stuff.  I like the stamps.  They are too cute.  It was a bit more expensive than the small love kit.


A DRAGON THAT FLY'S

I know, I know....the title is goofy, but sometimes goofy is just called for.  Here is a card that I made for a friend of mine that is in love with dragonfly's.  I used DCVW Latte Stack paper for the purple base and the blue/gray glitter dragonfly.  I cut the dragonfly from the Home Accent cartridge on my Cricut.  I used cream cardstock for the second layer and ran it thru the Cuttlebug.  I can't remember the name of the folder (I'm getting old...sorry I think it's Distressed "something," but I could be wrong.) 

 I used charcoal and brown cat eye chalk ink to color the raised areas on the cream cardstock.  I just use a Q-tip to do this...dab the Q-tip in the ink and apply.  I'm sue there is some fancy tool to use, but I don't own it......YET.  I also used yellow ochre to ink the edges of the dragonfly.  I pop dotted the dragonfly on, and bent his wings a bit.  I used some brown rickrack ribbon and then stamped my message.  After looking at it, I should have stamped the message somewhere else, but since it was already completed I let it go.  I added the transparent gray flowers to the ribbon and called it done!

Thanks for looking.  As always your comments and feedback are wanted and welcome.  Have a great day.

Thanks,
Robyn


MY FIRST TRIP TO ARCHIVERS

Happy Wednesday!!

Okay, I know the title will make some of you GASP...  "What, this woman has never been to Archivers before?....The horror!  She can't be a true crafter."  Well, no I had not.....Until Sunday that is.

I was talking to a fellow blogger http://www.dallasscrapbook.blogspot.com/ and she highly suggested that I make a trip over there.

Let me just tell you that when my DD and I walked in the door I looked at her and told her that I was like a kid in a candy shop...I was giddy!  Oh my goodness the place is awesome.  They have so much stuff that I didn't know where to start.

The funny thing is that my DD (who likes to craft, but certainly isn't into it as much as I am) had more stuff in her basket than I did.  We had to take inventory before we checked out just to make sure that I wouldn't go bankrupt from the purchases.  We did have to put a number of thigs back.  She and I both are already planning for our next trip.  Soooo...thanks Dallas for the tip.

Here are some pics of things I purchased.  The kits are too cute. 


This is a Making Memories vintage findings LOVE kit.  It has some of the cutest paper and embellies in it.  I thought it reasonably priced for what you get.  


Here is a picture of the back of the package.  It shows you everything that you get in the kit.  I think these will make great V-Day cards.  I love the string and the BINGO card.

Tuesday, January 26, 2010

SIMPLE BUT ELEGANT

Hi everyone!

Happy Tuesday.  I hope everyone had a relaxing weekend.  We went to see Avatar.  I must tell you that I was not crazy about seeing this movie.  My DD had been trying to get me to go see it with her (she saw it opening weekend) for a while.  Well, I finally agreed.  Typically if a movie is getting a lot of hype, I don't like it.  However, if it gets bad reviews or so-so reviews I love it.  I guess I'm just weird like that!  We went to the theater, and I had very low expectations.........3 hours later I came out totally blown away with this movie.  I thought that it was fantastic.  It was nothing like the previews.  If you get a chance to see it while it is in 3D, I highly recommend it.  What did you do this weekend?


This is a card that I made several months ago.  I needed a simple yet elegant card, but I needed it in a BIG hurry.  I just used black cardstock for the base and this pretty black and white paper (it has glitter on the flowers.)  It's from a DCVW pack called The All Dressed Up Glitter pack.  I used the Fiskars Threading Water border punch on the black card base.

 I added the glittered top layer, rounded the corners and a velvet black ribbon. I cut some more of the black and patterned cardstock and layered it and rounded the corners.  I then I stamped the flowers on the top piece of black cardstock using a stamp set that I got at Michael's.  I used white ink.  I found a little pearl embellishment in my stash and added that.

It didn't take long at all to complete, and I think it looks pretty good for a quick card.

  I hope you are having a great week so far.  As always, comments are always welcome.  I love hearing from you and getting your feedback.

Thanks,
Robyn

Thursday, January 21, 2010

IS IT FRIDAY YET???

Hi guys,

Are you as ready for the weekend as I am?  This has been a looong week for us.  It seems like we have had somewhere to be every night this week.  To top it off, I had to go to a meeting at my daughters school to get her PSAT score.  She did very well, but the wealth of information that one must possess on college prep is mind blowing.  Gone are the days of waiting until you are a junior to decide where you want to go.  We are being told to start next year (She will be a freshman.)  EEKS!  Who new you have to start preparing in 9th grade. 

Well, now that I am done ranting...sorry...Here is a card that made today.


I used brown cardstock for the base.  Pink cardstock for the top layer.  I distressed the edges with Tim Holz Tea Dye Ink.  The stamps are from a Stampology set that I picked up at Michaels.  I just thought that they were too cute.  I used my Fiskars 2" scallop punch, cut circles from PS on the Cricut and then stamped my image.  I wanted some ribbon on here, but everything I tried looked so plain.  I finally decided to loop some pink cording around the brown zig-zag.  I'm not sure if that works or not here.  I do love the sentiments on the stamps though.  I pop dotted the first and last sentiments just for something different.


I thought that the inside needed something too...so I just used a pink scrap.  I rounded the edges, distressed with the same ink and put the buttons on.  I found a stamp from a different Stampology set that worked perfectly with the ones on the front.  It really jazzed up the inside of the card.  I usually don't put anything on the inside of my cards, but I am trying to think outside of the box.

What do ya'll think?  As always, thanks for looking.  I love hearing from you, comments are always welcome.  Have a great afternoon and remember that tomorrow is FRIDAY!  Whoo-Hoo...

Robyn
Saturday, January 16, 2010

SPRING IN WINTER!


As you know from my last post I am NOT procrastinating.  Here are some more cards that I have done for the Spring plant sale booth.  I used the DCVW Citrus pack for the base and layers. I used a Fiskars border punch (I can't remember the name of it...I'm sooo bad about that.)  I stamped the Friendship sentiment (from a set I got at Michael's) and added one of those cute handmade flowers with the button.


I got these cute glittery flowers in a K&Company Pack from Wal-Mart.  I cut a yellow flower from PS on my Cricut and used a paint pen for the dots.  Then I put the glitter flower on top of it.  I used a little flower at the top right, some grossgrain ribbon that I dotted with the paint pen.  (I'm thinking that wasn't the most brilliant idea that I have come up with because it bled out some.)  Did I mention I love this Citrus paper pack. 


This picture didn't turn out very well, but you get the jist of it.  The base is just plain ole' yellow card stock.  I inked the edges with Martha Stewart ink.  The top layer is from the 4.5 X 6.5 DCVW Glitter Sweet Stack.  (I like using these smaller stacks for my cards because I feel like I waste less paper...Whether that's true or not...who knows.) I tied a twine knot at the top, used a SU stamp for the sentiment, added a little bling and put a button in the center of the flower.  The sentiment is hard to see in the pic, but it says Delight in Life. 

I hope you have a fantastic weekend.  My DD and I are going to see The Blind Side this evening.  I hear it is wonderful.  Has anyone seen it?

As always, thanks for looking.  Comments and idea's are always welcome.

Robyn


Friday, January 15, 2010

Flowery Friday


I have been asked to set up a card booth at our Spring Plant Sale in March for the High School Band Boosters.  They want the cards to be "Springy."  I decided that I need to get a head start on this because I am a World Class Procrastinator!!  Typically I wait until the veeery last minute and then kill myself trying to get everything done in one day.

I saw a variation of these flowers over on Dawn McVey's blog (go check it out, she uses pages of a book to create her flowers.)  I adapted them to fit my needs.  I just took some white cardstock and stamped various colors on it.  I let it dry and then cut 5 flowers out on my Cricut.  I then crumbled them up, un-crumbled them (yes un-crumbled is the technical term.)  I stacked them together and secured them with a brad.

BLUE FLOWER CARD
 I placed a blue button threaded with twine in the center and accented with leaves.  I inked th leaves with green ink.

PINK FLOWER CARD
I placed a pink button threaded with twine in the center.  I stickled leaves and the edges of the flower.  I haven't stamped any sentiments on these yet since I don't know what they will be used for.  I may just leave them as they are.  What do you think?

Thanks for looking.  As always comments and ideas are welcome.  If you are interested in the specific products used, just e-mail me.  Have a great weekend!

Robyn


Tuesday, January 5, 2010

A Dedication To The Amazing Pink Stamper

Hi guys,


This is my very first blog post...Whew-hoo for me.  Stick with me as I figure out this wacky world of blogging.


Let me give you a little background before I get going on this post.  I have been scrapbooking for about 6 years.  Last year around Christmas time a received a Cricut Expression from a dear friend.  What a great gift AND a great friend huh!  I was amazed.  Well, I was VERY intimidated by this machine that I had only seen on T.V.  It sat on my kitchen table until mid January, when I finally decided that it was high time I attempted to create something.  I went online looking for some type of information on how to operate the Cricut.  Well, I was TOTALLY bleseed to run across a YouTube video made by this lady showing me how to use my Cricut to make a card.  This lady also was a stamper and scrapbooker.  I was just amazed at what she was teaching and did a YouTube search for her.  Luckily this great lady has made a bunch of video tutorials on how to use the Cricut, and some other neat tips and tricks for crafters.


This great lady is none other than MyPinkStamper!  Now, I had never heard of her before, but I noticed that she had a blog, and a bunch of followers.  I sat and watched almost ALL of her videos in a two day period.  I was so inspired that I decided that what had seemed very intimidating to me (the Cricut and cardmaking) didn't seem so hard.  I could do this...I really could. 


So....I pulled out some of my scrapbooking materials and got to work.  The card below is my very first creation.  Now I know that it isn't as put together and fancy as some of the others people have done, but I was proud.  This got me hooked.  I was off to Hobby Lobby in a flash!!!  I purchased all sorts of neat papers, tools and embellishments.  I ordered some stamp sets and was off......


That was almost a year ago now, and I have made tons of cards and scrapbook pages.  Some of them you will see here.  I owe it all to Robyn...  She was and is such an inspiration to me.  if you haven't heard of her, which I'm sure you have, please visit her at http://www.mypinkstamper.com/  She will just amaze you with her knowledge and her upbeat positive attitude and humor! 


Please keep checking my blog as I add new cards and scrapbooking layouts.  Your comments are always welcome.  I hope to hear from you all.


Thanks,
The Scattered Scrapper

A Variety of Cards

Please hang in there with me as I learn how to use all of the tools to blog.  I am re-posting these pics because when I originally posted them I did so incorrectly. I somehow ended up posting them where I add Gadgets, when I should have put them in my post.  So when I went in to type a new post, it kept showing up at the bottom of the page, not the top.  Does that even make sense?  DUUH!  Just typing this I have confused myself :o)  I am VERY computer challenged.  My goal for this year is to learn more about computers.  Oh...and to use less cuss words...I'm not sure these two can be accomplished at the same time.  Thanks for hangin' with me.


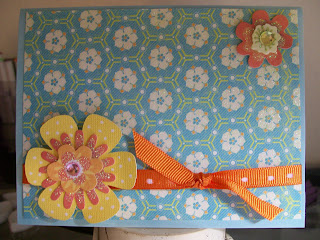
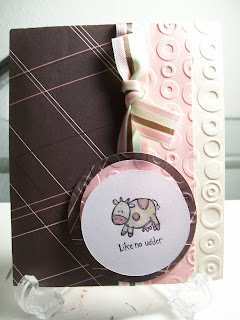
I hope everyone had a great Christmas.  I am now ready for this cold weather to go away, and for Spring to arrive.  Here are a variety of cards that I have made over the last year.  Some of them are the early ones I made when I first started.  You can certainly tell which ones were the first.  It's neat to see the progression as I have learned how to use more tools and gotten better at using the Cricut machine.  There are many more pics of cards that I have done.  Keep coming back as I post more of them.  Now that I am blogging, I will just have to remember to take pics of the cards before I give them away!!  Thanks for looking and your comments are always welcome.


If you would like details on specific items used, just e-mail me.  Thanks.

Robyn